With the demand for frequent Instagram wall updates and involvement in other official projects, the need for a quick photo editor with basic editing tools has become essential. The Cut Paste Photo Edit App not only allows you to securely upload your photos in high quality but also provides a diverse selection of funny stickers and filters such as vintage, bleach, sepia, and more.
Add text to your photos in seconds and access multiple customization options to adjust color, size, font, transparency, etc., making your images absolutely stunning. Write with ease, and rotate in any direction according to your creative preferences.
If you don’t have a pre-saved image that fits the bill, worry not! Our Cut Paste Photo Edit App comes with a built-in selfie camera featuring unique filters for capturing amazing photos every time. Crop out unwanted elements, people, or backgrounds, and replace them with new backgrounds or objects to enhance the allure of your image.
Save your edited images effortlessly and share them on various social media platforms like Facebook, Twitter, Instagram, etc.
Select any image from your personal library and apply various filters, frames, stickers, and effects. Flip, rotate, or adjust as per your preferences to make your pictures more attractive and eye-catching. A simple picture can transform into a gallery-worthy canvas when edited properly with the right tools. The app allows you to crop out undesirable elements and introduce new, more attractive ideas to your canvas, making your picture cutting-edge.
Go to the Windows App Store and search for the ‘Cut Paste Photo Edit‘ app. Download and open it on your device.
- After opening the app, you will see two options: Cut Photos and Paste Photos.
Cut Photos :-
Step 1:-
- Click on the ‘Cut Photos’ button, and select your desired picture from your gallery. This action will remove the background of the chosen photo.
- Once you have selected your photo, begin removing the background by using the auto eraser. Simply click on the areas of the background that you want to erase.

Step 2:-
- Click on the ‘Extract‘ button. Draw the outline, and then choose the ‘Cut Inside‘ button to remove the area inside the outline, or click on the ‘Cut Outside‘ button to remove the area outside the outline.
- Click on the ‘Extract‘ button. Draw the outline, and then choose the ‘Cut Inside‘ button to remove the area inside the outline, or click on the ‘Cut Outside‘ button to remove the area outside the outline.

Step 3:-
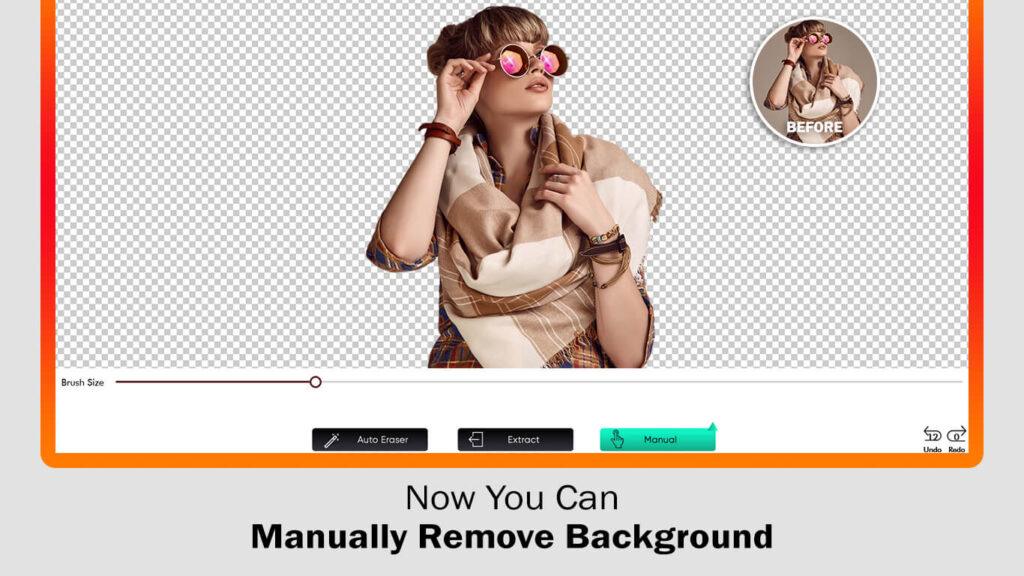
- Click on the ‘Manual‘ button to erase the background manually by drawing on the desired areas.
- Click on the left color button to access multiple background color options. Adjust the brush size for erasing and use the undo or redo options as needed. Once you are satisfied with the erasing, click on the ‘Save’ button to proceed to the next editing feature.

Step 4:-
- Click on the “Photo” button. If you want to add more photos, you can either select them from your system gallery or click on the camera icon to capture a new image.
- Click on the ‘Background‘ button and select a color or pattern background style according to your preference. Choose from a variety of cool and amazing backgrounds that are available.

Step 5:-
- Click on ‘Stickers‘ and add multiple creative emojis to your photo. The app provides lots of categories; just choose your favorite category and use stickers to enhance your image creation.
- Click on the ‘Add Text‘ icon and compose your text using stylish fonts, colors, sizes, etc. You can also adjust opacity and many more settings to customize your text.

Step 6:-
- Click on the ‘Border‘ button and choose between collage border and corner radius options. Adjust the border width, border radius, and select the border color or pattern that suits your preference.
- Click on the ‘Status‘ button and add beautiful status stickers to your photo. Choose from a variety of amazing status stickers to enhance your image.
- Click on the ‘Cutout‘ button to access the cutout that you created using the ‘Cut Photo‘ feature.
All done! Now click on the Save button to save your photo creation. Start sharing it with your family and friends on your favorite social media.

Paste Photos :-
Step 1:-
- Click on the ‘Paste Photos‘ button and open it.
- Click on the ‘Cutout‘ button to access the cutout that you created using the ‘Cut Photo‘ feature.
- Now, click on the ‘Photo‘ button and choose an image from your system gallery, or click on the ‘Camera‘ button and capture a new photo using your camera.
- Click on the ‘Background‘ button and select a color or pattern background style according to your preference. Choose from a variety of cool and amazing backgrounds available.

Step 2:-
- Click on the ‘Add Text‘ icon and compose your text using stylish fonts, colors, sizes, etc.
- Click on the ‘Stickers‘ button and add multiple creative emojis to your photo.

Step 3:-
- Click on the ‘Border‘ button and select your photo background. Here, you can adjust the border width, border radius, and choose the border color or pattern according to your preference.
- Click on the ‘Status‘ button and add beautiful status stickers to your photo. Choose from a variety of amazing status stickers to enhance your image.
- Click on the ‘Cutout‘ button to access the cutout that you created using the ‘Cut Photo’ feature.

Step 4:- Click on the ‘Save‘ button and choose the photo extension. You will be directed to the save and share screen, where you can share your work with your loved ones through various social media platforms.

