
Photo Blender Camera
Photo Blender Camera emerges as a simple yet powerful editing app. With its capabilities, you can seamlessly blend two images with perfect synchronization, setting yourself apart in the crowded social media landscape.

With the surge of Instagram and Facebook posts, the need for a quick photo editor has become essential. Standing out from the multitude of Instagram influencers and reel makers is key. Photo Blender Camera offers a simple yet powerful editing app, enabling you to seamlessly blend two images with perfect synchronization.
Create a fantastic magical blend effect by combining any two of your photos into a single captivating composition. The app overlays a transparent image from the first photo onto another taken from your gallery or camera, providing a unique touch. Apply exclusive photo effects using the selfie camera with a single tap, or choose any picture from the gallery for extensive photo editing options, including flip, rotate, filters, text addition, multiple emojis, and more. Elevate your images with funny face masks, catchy taglines, and a touch of uniqueness and class.
The custom blend feature is fully loaded, allowing you to select two images of your choice and adjust the opacity of each independently. Crop images according to preferred ratios for a personalized touch.
Explore multiple backgrounds that add a classy and artistic look to your images, and apply unique filters for further enhancement. Add text to your images to immortalize your memories. Download and enjoy this marvelous application on your PC or laptop.
Step 1:-
- Now that you’ve downloaded this marvelous application on your PC or laptop, launch it by clicking on it. When the app opens up, you’ll be presented with the option to create a collage using the ‘Grid Collage’ feature on the home screen.
- Choose the grid size from a variety of sizes and grid columns available. You can even opt for a grid specifically designed for uploading on Facebook, Instagram, or Twitter.

Step 2:-
- The ‘Adjustment’ icon allows you to alter the border-radius and corner radius by adjusting the slider accordingly.
- You can change the colored and patterned background on the photos by using the ‘Fill’ icon on the right pane. Choose from the numerous options available.

Step 3:-
- You can fine-tune your photo border and corner radius to your liking. Next, click on the flip/rotate button and adjust your collage images.

Step 4:-
- Click on the Effects button to add realistic filter effects to enhance your grid collage photo creation.
- Click on the stickers icon, which will provide you with a plethora of options to choose from.
- Click on the Text button to add text to your grid collage creation. You can customize text background color, change text shadow, text color, text alignment, opacity, add space, and even add a default caption to enhance your grid creation.

Step 5:-
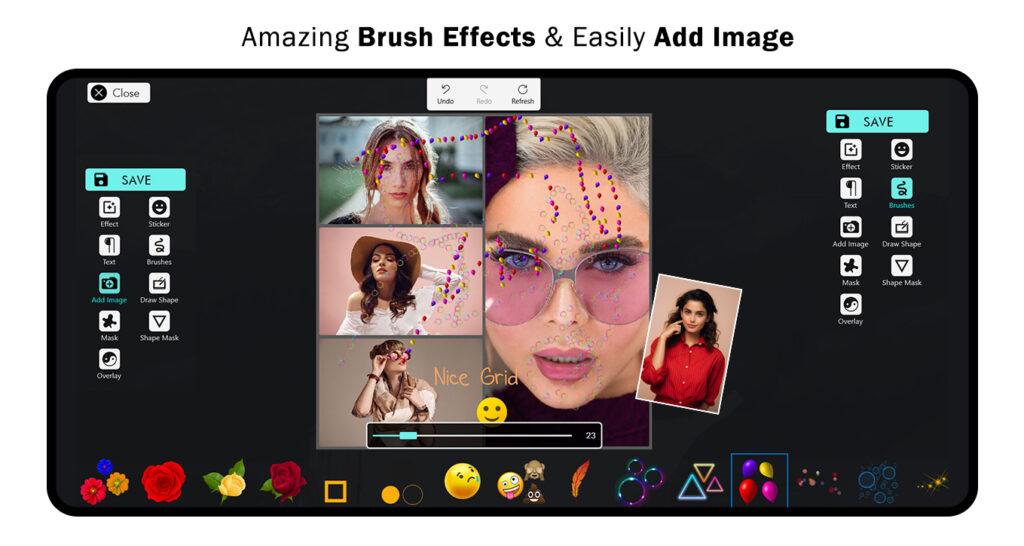
- Draw stickers using the brush tool. There are lots of amazing stickers to brush onto your collage photo, and you can also adjust the size of the brush.
Step 6:-
- Click on the “Draw Shape” feature to add a particular shape. Choose from the options provided, offering a variety of customized shapes to enhance your collage.

Step 7:-
- Click on the “Mask” feature to add a mask of a particular shape. Choose from the options provided, offering a variety of customized masks to enhance your collage.
- Click on the “Shape Mask” feature to add a mask of a particular shape. Choose from the options provided, offering a variety of customized masks to enhance your collage.
Once you’ve completed all the edits, click on the save button to store your collage in the gallery of your device.
